Wrapping Unconventionally Shaped Gifts
Tips and tricks for wrapping presents that are odd shapes.
Each year, as Christmas approaches, there comes a time when shopping is done, and it's time to begin wrapping everything up. Gift wrapping offers the perfect opportunity to add an extra layer of thoughtfulness and care to gift giving. Showcasing your wrapping skills with beautiful presentation excites the recipient and makes the experience even more special. However, wrapping presents isn't always a walk in the park. When those tricky shapes—like mugs and soft toys with no boxes—appear, it can be a struggle to know where to start.
How To Wrap A Soft Toy
Soft toys are one of the most common and thoughtful gifts, especially at Christmas with brands like Jellycat releasing a wide range of festive characters perfect for all ages. Unlike books and games, soft toys are squishy with no straight lines, meaning wrapping them can seem difficult. The traditional box method of wrapping can look out of shape or be difficult to hold together when the gift isn't a regular shape like a soft toy. Luckily there's an easy way to wrap a soft toy with delightful presentation that will spark joy in the recipient, showing them you have put time and consideration into their gift.
The Gift Bag Method
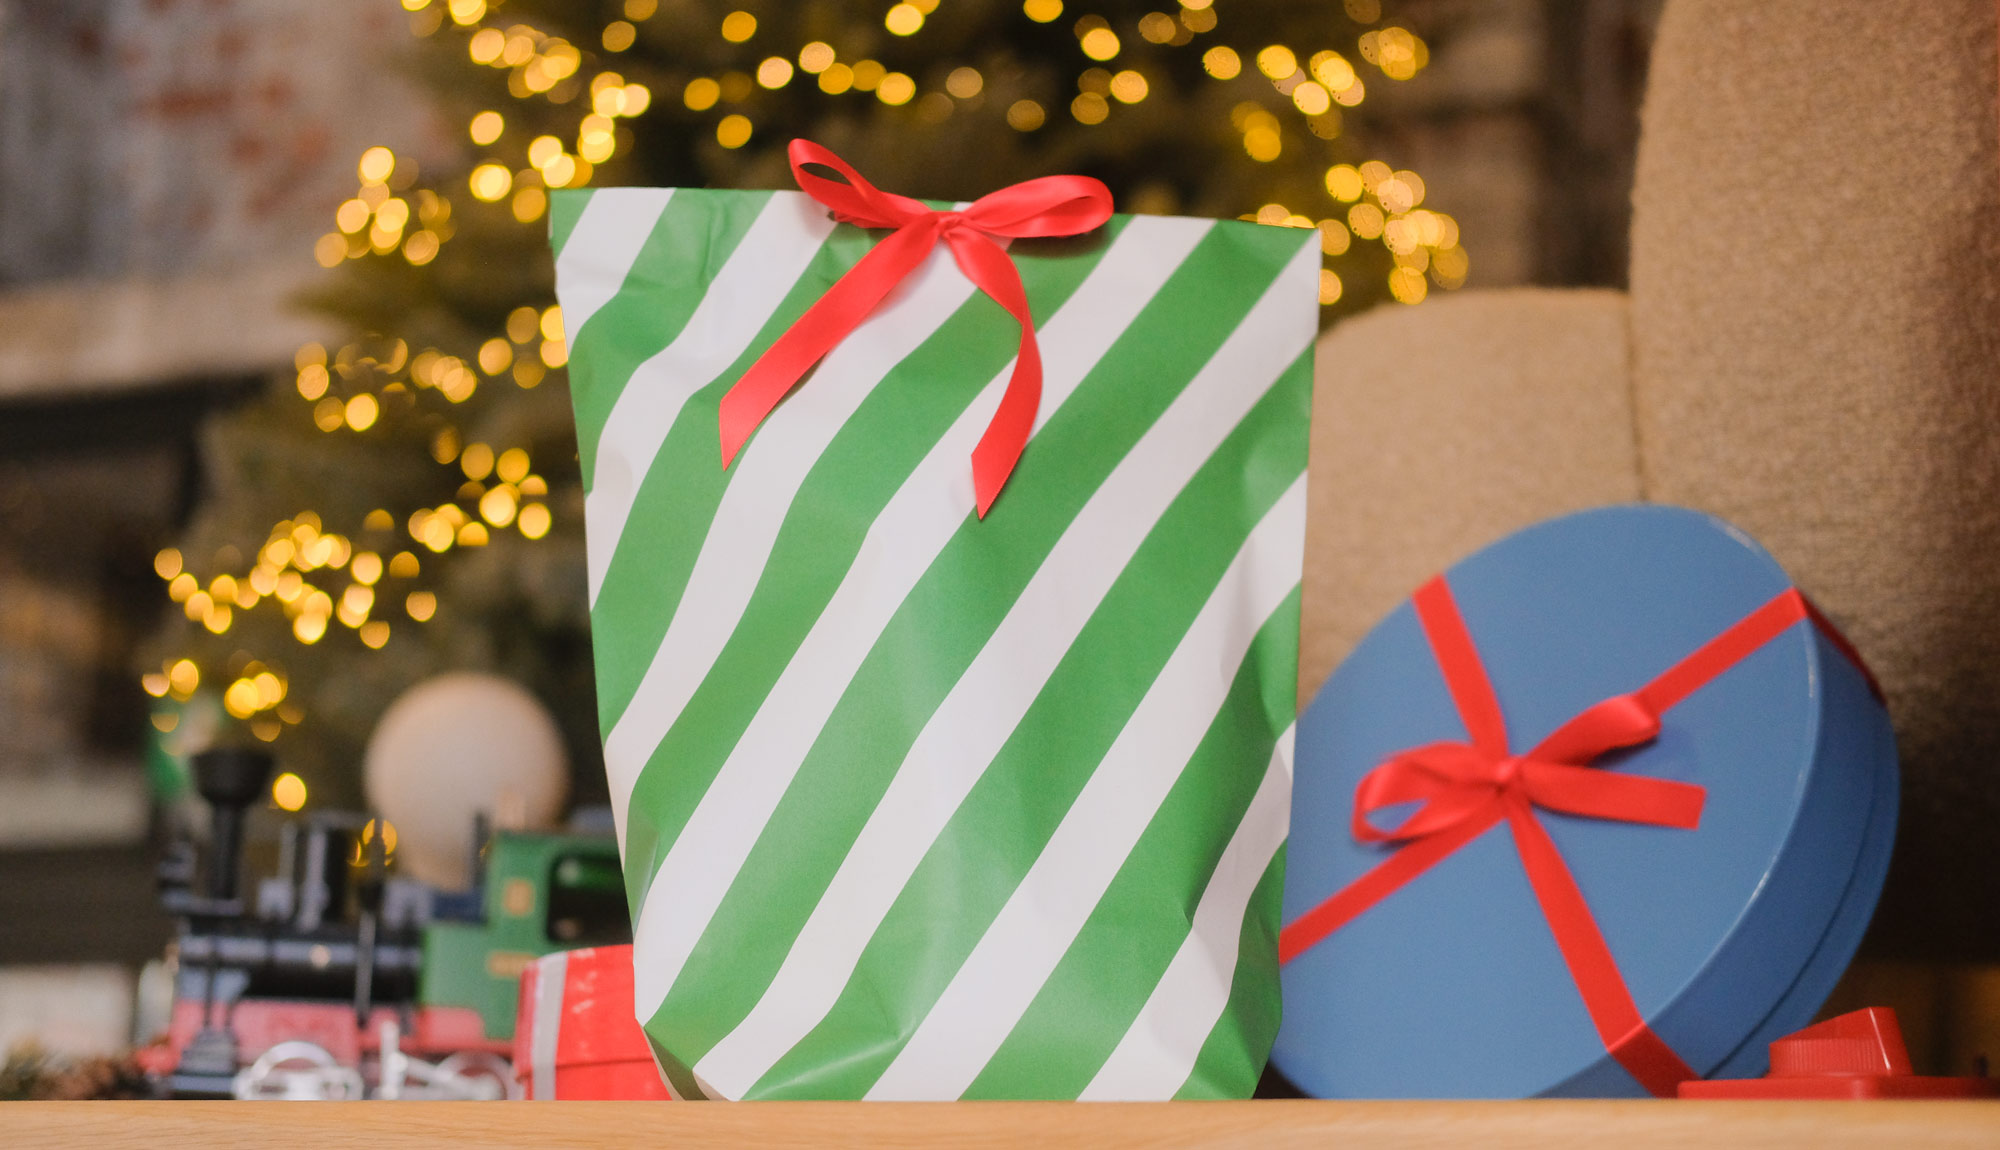
A popular method for wrapping odd shapes is one which involves making a custom bag out of wrapping paper. Think of it as a nice paper bag that can be made to fit almost any shape and fastened at the top with a bow for impressive presentation. The gift bag method is perfect for soft toys as it keeps its shape and avoids looking messy, plus it's easy to do!
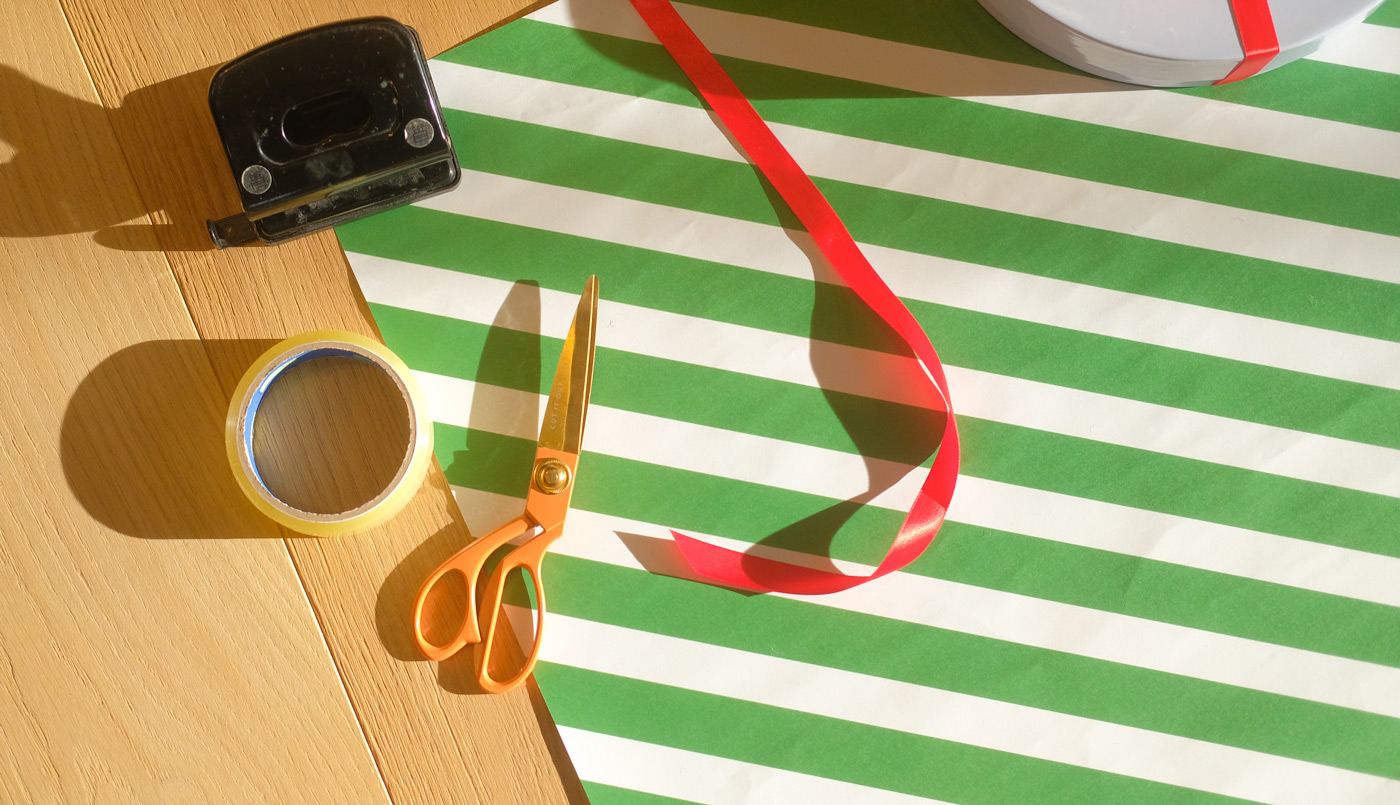
What do you need to wrap an oddly shaped gift?
1. Wrapping Paper
To start, it's great to choose thoughtful wrapping paper, perhaps a colour scheme or pattern that reflects the recipient's personality or something they can reuse or recycle. If the gift isn't too big, single sheets of wrap mean minimal waste and easier manoeuvring when measuring and cutting.
2. Scissors
Good-quality, long, sharp scissors are useful as they help to have straight and neat edges making your presentation look smart. However, don't worry if the paper is a bit jagged when cut as you can always make a small fold to hide it if necessary!
3. Tape
The final thing you'll need when wrapping a gift is some tape. Choosing the right tape for wrapping presents can be as simple or creative as you like, clear tape is an easy option since it's usually available in lots of places. Double-sided tape means you can hide it for a slick and tidy look, or playful tapes like washi tape can add a pop of colour and creativity.
4. Ribbon (optional)
Some extra materials that aren't necessary but add some finesse to your wrapping include ribbon or string, gift tags or labels, stickers, glitter etc. These options can really make your wrapping stand out or hide mistakes...
How to wrap a soft toy with the gift bag method:
Instructions
Method : Gift Bag
Item : Soft Toy
Time : 5 Minutes (approx)
Materials :
Wrapping Paper
Scissors
Tape
Hole punch (optional)
Ribbon (optional)
Step 1: Measuring Your Paper
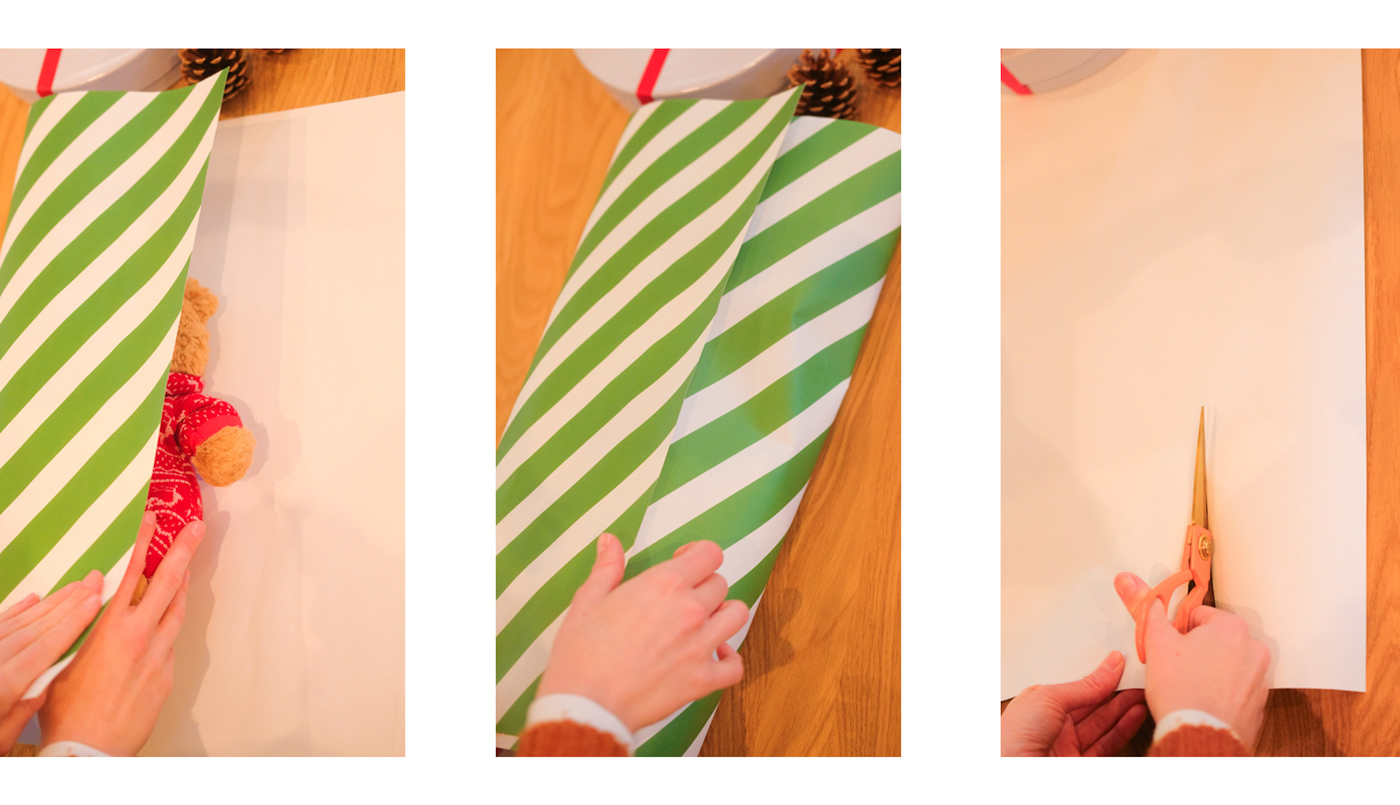
Firstly place your chosen gift vertically in the middle of a sheet of wrapping paper, covering the item with paper from each side to measure how much you need. Making sure you've enough paper to cover the item loosely, cut off the excess.
Tip : Keep your offcuts of paper to repurpose into gift tags or for smaller gift wrap jobs.
Step 2: Creating The Main Structure
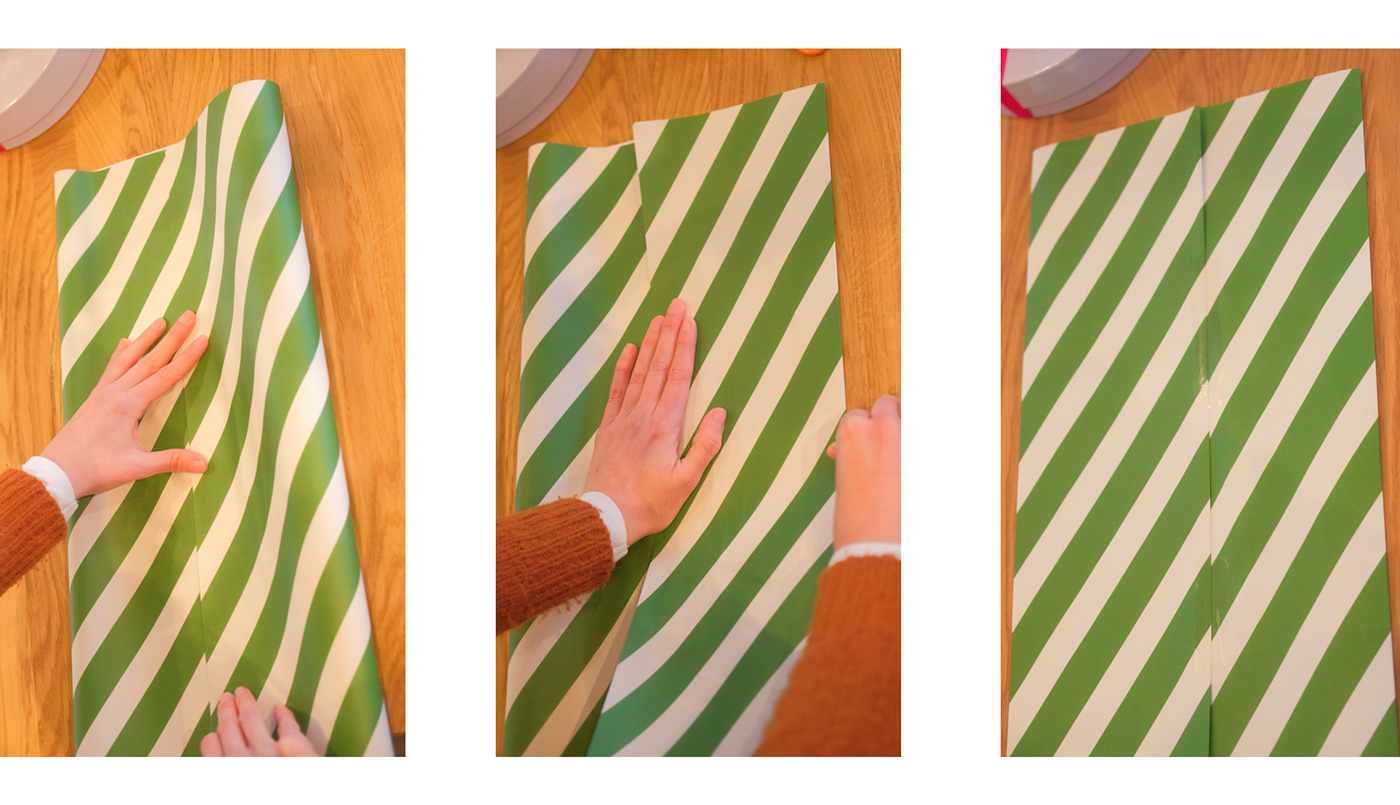
The Next step is simply to line your paper up so it meets in the middle, flatten your edges and secure together in the middle with tape. Your gift can be put to one side for this step, the paper should be empty and flat while you're sticking it together.
Tip : Although cutting a neat edge is preferable, if your edge ends up jagged you can make a small fold to hide it.
Step 3: Making The Base For The Bag
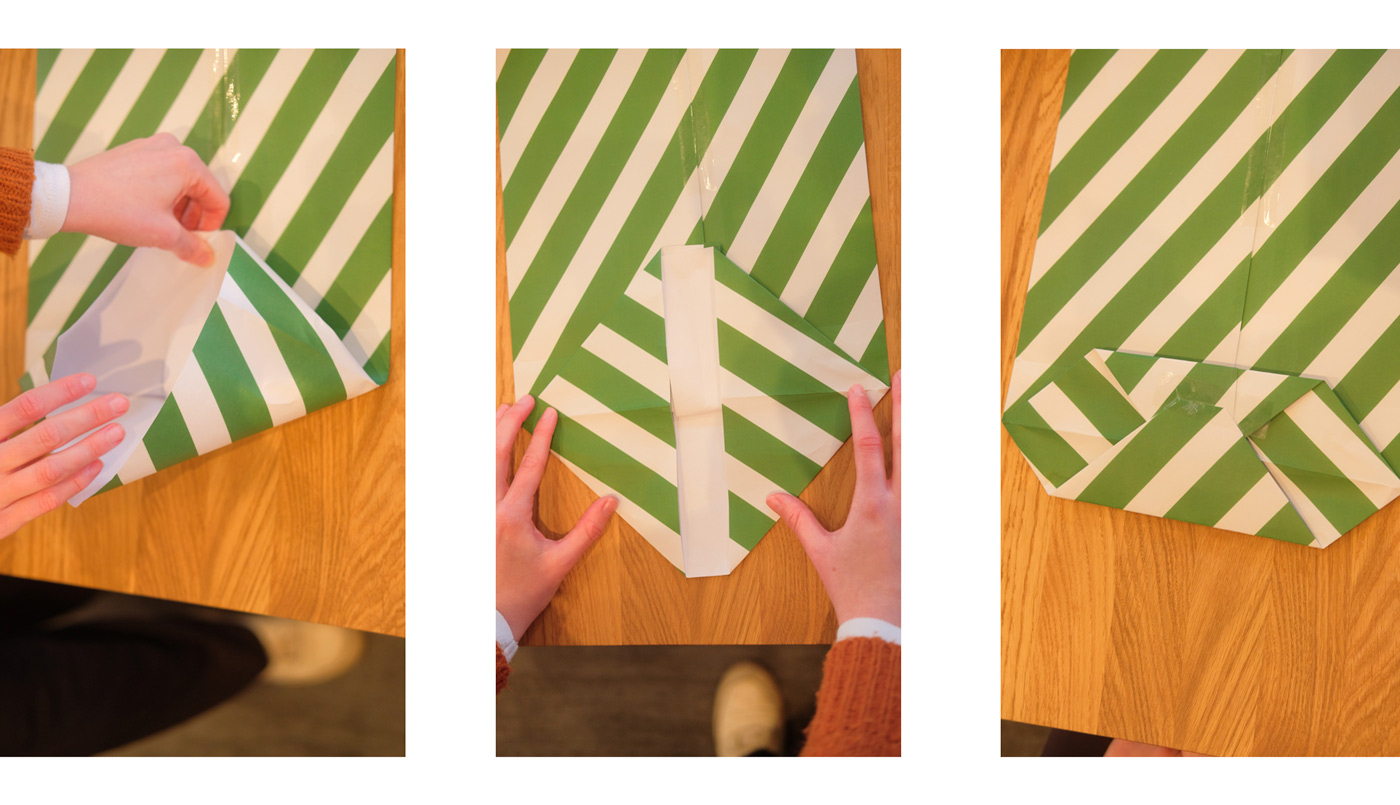
Step three is securing the bottom of the gift bag. Fold up from the bottom the required amount, now fold the sides of this section inwards resembling a triangle and flatten. Fold the pointed pieces to just past halfway and secure with tape, this part is similar to how you would wrap the end of a boxed gift.
Tip : Place your gift at the bottom using the item's width as a guide for how big the base should be.
Step 4: Closing the Finished Bag
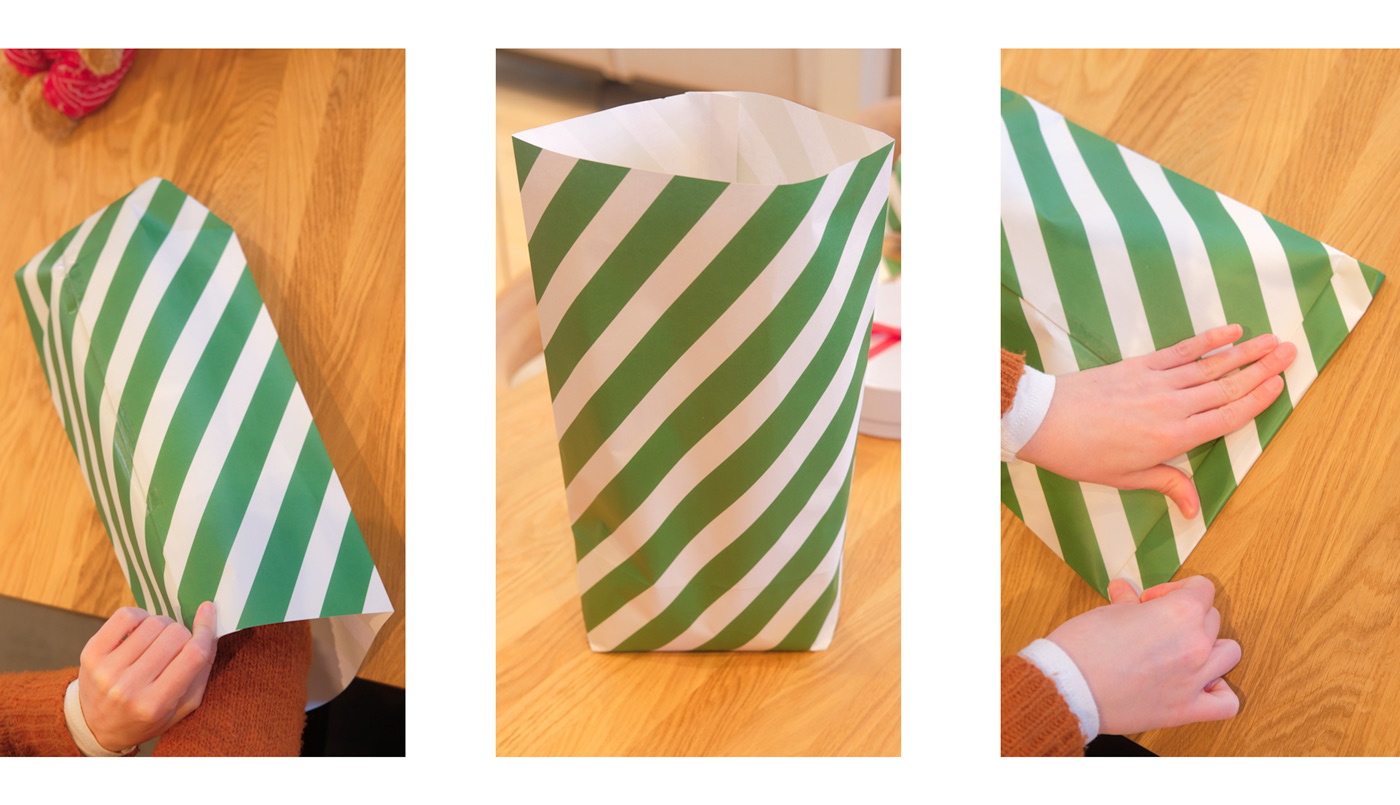
Now that the structure and base are all secured, gently open up the bottom of the bag and pop your gift inside from the top opening. The bag should stand upright with your gift inside, now all that is left to do is fold the top to close the bag. You can secure the top with tape if you're not adding ribbon and your gift wrap is complete!
Step 5 (Optional): Adding Ribbon
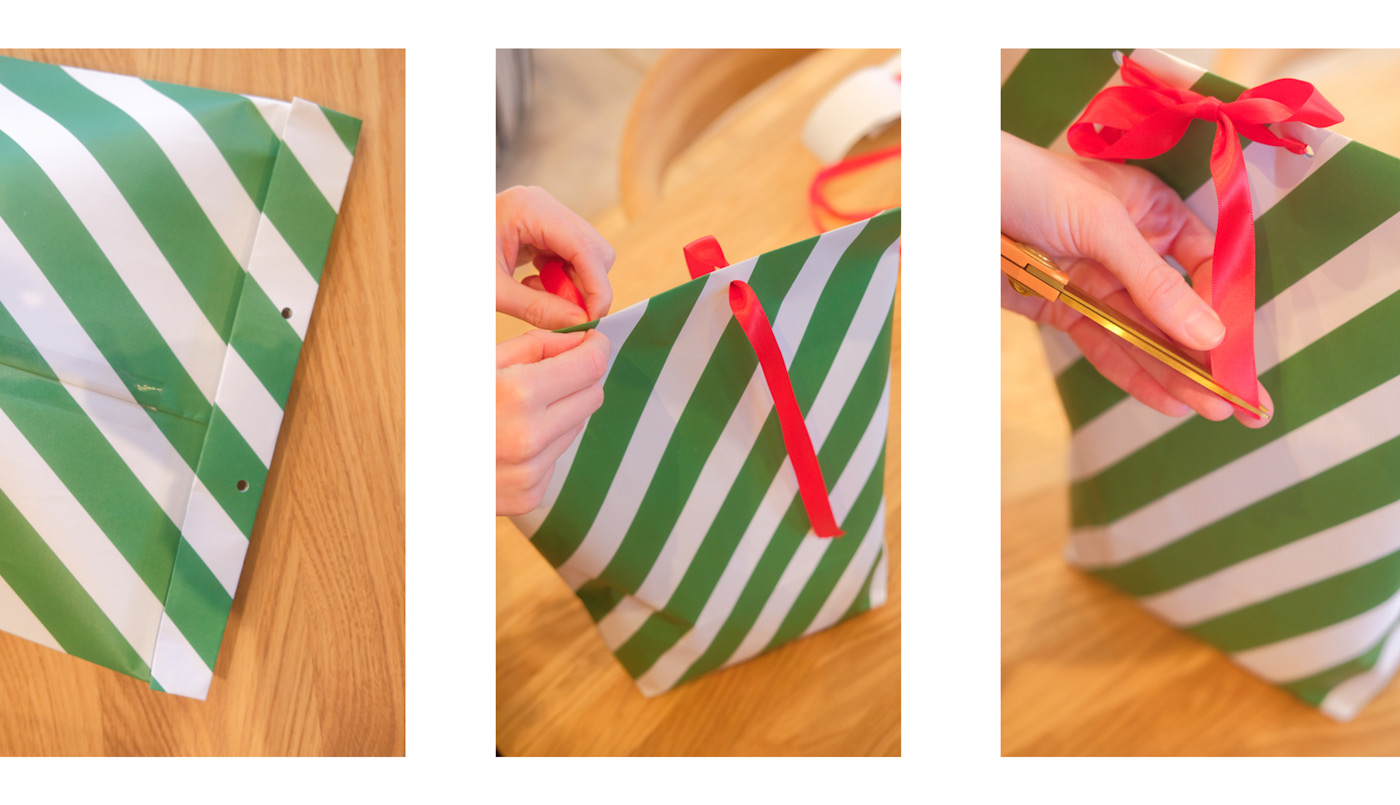
The fifth and final step is to add a ribbon and any thoughtful decorations to showcase your creativity and make the recipient's experience extra special. You can add a ribbon by using a hole punch and threading the ribbon through the holes before tying it in a bow at the front for an easy finishing touch.
Tip : Use the hole punch to make a hole in one of the offcuts of paper from Step 1 and add a matching gift tag!
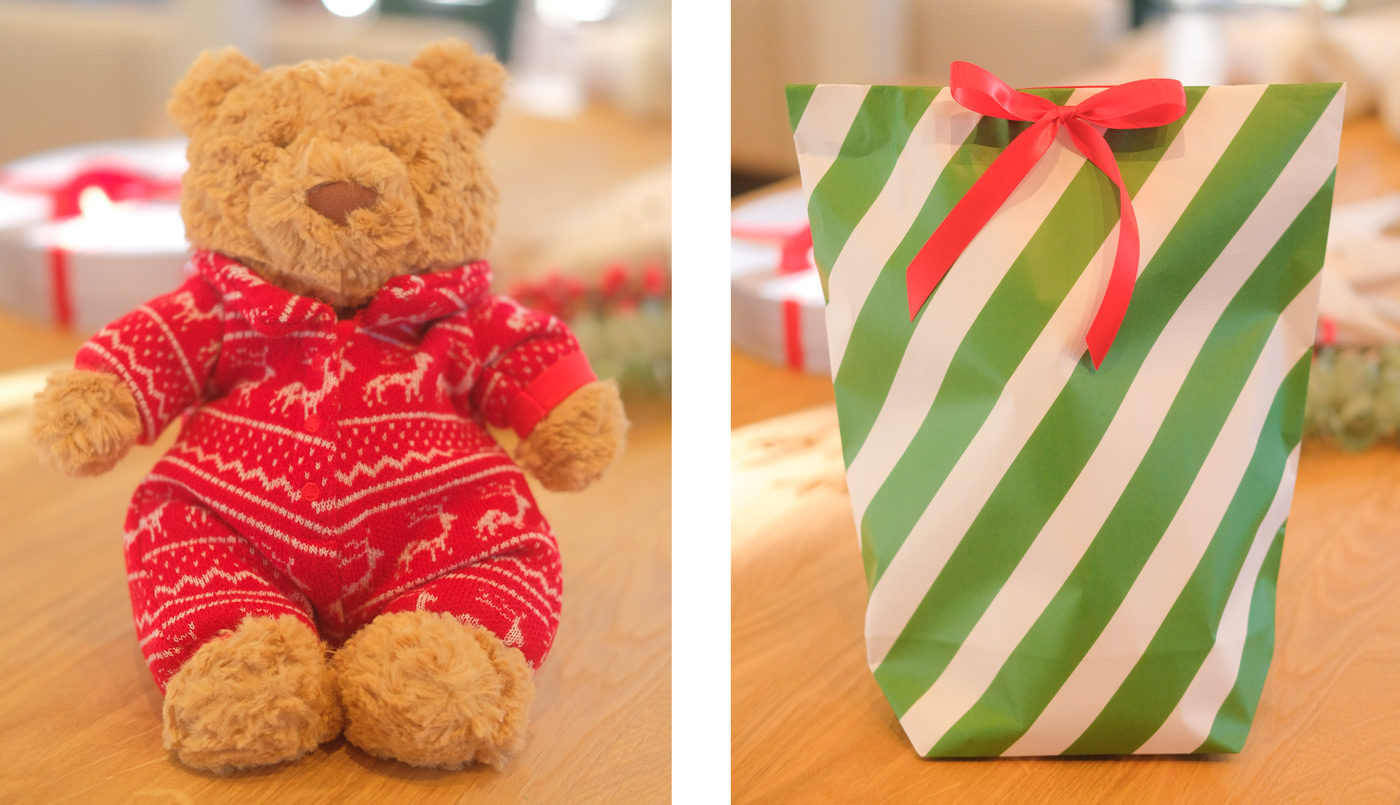
This gift bag method guide can be used to wrap soft toys and more, it works for almost any shape as long has you have paper big enough! Hopefully, this helps you to level-up your wrapping skills and show your friends and family you've put the extra time and care into their gifts.
For tips and tricks on thoughtful gifting check out The Art Of Thoughtful Gifting
-
ChristmasWinter Burr Basket IdeasRead More
There's nothing better during the winter months than embracing cosiness in its full form. Snuggling up on the sofa with a soft blanket and a cup of hot chocolate is one of the small pleasures in life, not to be...
-
ChristmasWrapping Unconventionally Shaped GiftsRead More
Tips and tricks for wrapping presents that are odd shapes. Each year, as Christmas approaches, there comes a time when shopping is done, and it's time to begin wrapping everything up. Gift wrapping offers the perfect opportunity to add an...
